
Make Your Own Sugar Free Coconut Milk in under 5 minutes with just one ingredient.
It’s a keto staple. But if you buy coconut milk you will know how expensive and how full of nonsense ingredients it is. Ever wondered how to make it yourself? It’s very easy and quicker than going to the shop, plus it tastes way better than the shop-bought versions.
ONE ingredient is all it takes. Everyone has water, right? So all you need to do is add water to the ONE magic ingredient and take it for a spin.
Coconut is, of course, your magic ingredient. Some people use fresh coconut. I use organic, raw coconut chips (U.S. alternative HERE). Desiccated ground coconut works too. I find that raw coconut chips produce a much creamier milk and are more natural than the desiccated coconut usually available from stores, which contains sulphur dioxide as a preservative.
You’ll need a decent blender like the one I use (U.S. alternative HERE). It is a real workhorse, very solidly made, with a glass jug and no flimsy plastic anywhere. I recommend it highly. The less powerful model I have in Italy does not reduce the coconut to a fine pulp like this one does, so the resulting milk isn’t as rich and creamy. This one isn’t the cheapest blender on the market, but it’s not the most expensive either, and it is excellent both in performance and build quality.
How to Make Your Own Sugar Free Coconut Milk
There are various methods and ratios scattered on blogs everywhere. After testing several of them, I have developed a routine which I find quick and easy with consistent results.
Equipment
Apart from a powerful blender, you will also need:
- plastic or glass container or jug
- fine mesh sieve
- muslin cloth (cheese cloth)
- funnel
- storage bottle with airtight lid


The steps are quick and easy:
- fill your blender jug with coconut chips up to the 400ml line (300ml line if using desiccated ground coconut)
- add boiling water to the 1200ml line (900ml line if using desiccated coconut)
- let the chips soften – wait until the water has cooled
- whizz at full speed for 30 seconds and rest for 30 seconds
- repeat the previous step a few more times
- position the sieve over your container or jug and place muslin cloth on top
- pour 1/3rd coconut pulp and liquid into the cloth, let the milk run through, then wrap the pulp and squeeze to get all the milk out and through the sieve
- repeat for the remainder, then transfer to a suitable storage bottle
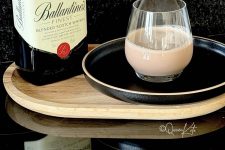
The milk needs to be refrigerated and will stay fresh for 3-4 days.

As the milk cools, coconut fat will rise to the top and settle. You can either remove this or leave it – as I do, for extra fat goodness. If you do leave it, it will go solid unless you shake the milk often as it cools down in the fridge. If you forget and the risen fat becomes solid, just break it up with a metal object and shake vigorously. After that, shake the bottle before each use and the fat lumps will disperse a little, allowing you to pour with ease.
If you choose to, you can set aside the leftover pulp and dry it in the oven at low temperature for several hours until you end up with re-usable coconut flour.
So there you go. If you’ve never attempted to make your own coconut milk before now, I urge you to try. Freshly made coconut milk is creamy, natural, delicious and healthy, and costs a fraction of the shop bought stuff.
If you prefer a richer milk, simply add less water. If you find the taste a bit bland (as it should be!) you can add a little stevia for sweetness and/or flavouring, but personally I wouldn’t bother.
Enjoy!
You can save this recipe or any recipe you ♥ to your Yummly collection. Scroll past the recipe box and you’ll see the button ↓
- Yield: 1 litre
- Serving: 100ml
- Calories: 60
- Fat: 5g
- Net Carbs: 0.5g
- Protein: 0.5g
- organic raw coconut chips
- filtered or bottled water
- fill your blender to the 400ml line with coconut chips (300ml line with desiccated ground coconut).
- add hot water to just below the 1200ml line (900ml line with desiccated coconut); wait for it to cool down and for the coconut chips to soften.
- whizz on highest speed for 30 seconds; rest for 30 seconds; repeat 2 more times.
- pour ⅓rd into a fine-mesh sieve lined with a muslin cloth, positioned over a jug or container.
- let the liquid run through, then wrap and squeeze the pulp until dry (you can either discard the pulp or use it to make your own coarse coconut flour).
- repeat previous step twice more.
- transfer your lovely coconut milk to a suitable container using a funnel.
- allow to cool and refrigerate.
- to avoid the formation of a thick fat layer, take the bottle out of the fridge and shake it vigorously every 10 minutes until very well chilled.


Absolutely yummy, thank you. Love your recipes, have made many and they have ALL turned out really well…..you know that saying …when you’re onto a good thing, stick with it! Thank you.
Thank you Colleen. You made my day!
Thank you, it sounds so simple. Will comment further on my results.
Pingback: sugar free low carb cinnamon sponge cake - QueenKETO